
A small tree stump is very good at being in exactly the wrong place. The tree is gone. The stump is not. And every time you mow around it for the third summer in a row, it gets harder to justify leaving.
Here is how to remove small tree stumps. Short answer: for a stump under 20cm (roughly 8 inches) in diameter, you have four realistic options — dig it out by hand, apply a chemical stump remover, treat it with Epsom salt and let it rot, or hire someone with a stump grinder. There is technically a fifth option, which is to pretend it is not there. Your lawn mower will not respect that decision.
The right method depends on your timeline, your tolerance for physical work, and how deep the root system actually runs.
How big is “small”?
In practical terms: a stump you can step over and see the full root collar. Roughly under 20cm in diameter at ground level.
Small stumps in Surrey and the Fraser Valley usually come from ornamental trees, young fruit trees, overgrown shrubs, or saplings taken out before they established. Common candidates are ornamental cherry, bigleaf maple volunteers, laurel from hedge removal, and cedar left after thinning.
The stump diameter gives you a rough guide to root spread — but species matters more than size. A 15cm cedar stump sits shallow and comes out in an hour. A 15cm bigleaf maple may have lateral roots spreading two metres in every direction at 25cm depth. If you are unsure what you are dealing with, dig a test cut 20cm from the stump edge before committing to a full hand removal. That one exploratory dig has saved a lot of people a wasted Saturday.
Method 1: Dig it out by hand
Best for: Stumps under 20cm diameter, shallow root systems, softwoods.
Time: Two to four hours. Cost: Your afternoon.
This works. It is physical, but it works. The process is straightforward once you know the correct order.
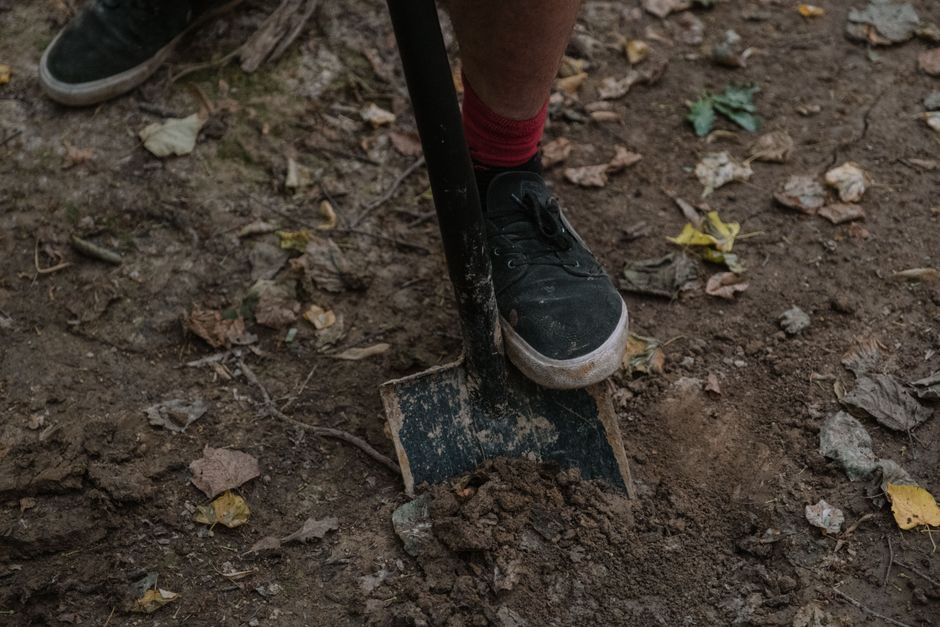
Dig a trench about 30cm out from the stump edge and go at least 30cm down to expose the lateral roots. Cut each one cleanly — loppers for roots under 4cm, a reciprocating saw with a wood blade for anything thicker. Work your way around the full circumference before trying to move the stump. Once all lateral roots are cut, rock the stump to locate the taproot. Cut the taproot at 30–40cm depth and the stump comes free.
Tools you need: mattock or digging bar, flat spade, pruning loppers, reciprocating saw. Nitrile gloves. Knee pads if you are spending time down in the trench. I reckon most homeowners underestimate the loppers — they are the most useful tool in the kit by a distance.
One thing I see regularly: homeowners start the job right, then get impatient halfway through and try to lever the stump free before cutting all the lateral roots. The result is a stump that shifts two inches and stops, a trench that is now too shallow to be useful, and a root system that is harder to access cleanly. Cut the roots first. Then lever.
For more on what to expect from different species once the stump is out, our guide to tree root pruning covers root regrowth patterns and how to manage them.

Method 2: Chemical stump remover
Best for: Stumps where digging is not practical, or where disrupting surrounding soil would cause damage.
Time: Four to eight weeks to soften. Cost: $15–$40 for stump remover granules.
Potassium nitrate granules — sold as stump remover at most hardware stores — accelerate bacterial decay inside the wood. Drill 2cm holes at least 20cm deep across the top of the stump, spaced about 5cm apart. Pack the holes with granules. Add water to activate. Cover with a tarp to retain moisture and reapply every few weeks.
After four to eight weeks, the wood is soft enough to break apart with an axe or garden fork. You can also burn it at that point where burning is permitted — though open burning is restricted through most of Surrey and Langley. Check BC's open burning rules before you light anything.
This method does not work on recently cut green wood. It is most effective on dry, dead wood that has already started to break down. A stump cut this spring is still too green — wait six months or use a different approach.
Method 3: Epsom salt
Best for: Patient homeowners.
Time: Two to six months. Cost: Under $10.
Epsom salt (magnesium sulphate) draws moisture out of the wood and kills the stump through desiccation. It is the most Googled stump removal method and also the slowest — worth knowing upfront.
The process is the same as chemical removal: drill deep holes, pack tightly with Epsom salt, water to activate, cover, and reapply every few weeks. The stump will grey, dry out, and become brittle over two to six months for a small softwood stump. Hardwoods take considerably longer.
One thing worth knowing: high concentrations of Epsom salt around the stump can affect soil chemistry and reduce grass growth in the immediate area. If you plan to re-seed that patch afterwards, give the soil a few weeks after the stump is out before planting anything. The Royal Horticultural Society's stump removal guidance covers this and other chemical considerations in more detail.
Method 4: Professional stump grinding
Best for: Stumps over 20–25cm, root spread wider than practical to hand-dig, stumps near structures or utility connections.
Time: 30–90 minutes on-site. Cost: $200–$500 per stump in Surrey.
A stump grinder goes 20–30cm below grade, destroying the root crown and preventing regrowth. The wood chips left behind can be raked in as mulch or removed. For professional stump grinding in Surrey, we include grinding with all standard removals — it is part of the job, not an add-on to negotiate separately.
Nine out of ten calls I get for stump removal are from homeowners who started digging, hit a root system bigger than expected, and called. That is not a failure — it is the right call. Rule of thumb: if you dig a test trench 30cm deep and find roots thicker than your wrist running in three or more directions, stop digging and book a grinder.
For full context on what tree work costs in this area, our Surrey tree removal cost guide breaks down pricing by job type and what drives the variation.

Methods to skip
Burning in place. Open burning on a residential stump is restricted under BC regulations in most of Surrey and Langley. Beyond legality, burning rarely kills the root system — the fire goes out before it burns deep enough, and you end up with a charred stump that is now harder to grind.
Prying before cutting. Using a lever bar on a stump before cutting lateral roots is how you create a stump that shifts two inches and refuses to move further. The roots have to go first.
Rock salt or table salt. Regular salt kills the surrounding soil biology, not just the stump. Grass, garden plants, and anything you replant afterward will struggle. Epsom salt used carefully does not have the same effect on surrounding soil — but standard rock salt does lasting damage.
When not to call us
Honestly: a stump under 20cm in accessible open lawn — no structures nearby, no utility lines, soil that is not clay-bound — is a reasonable DIY project. A shovel and a Saturday is genuinely all you need for most softwood stumps in this size range. We would rather you save the call-out for jobs that actually need it.
You do not need us for:
- A small stump in open lawn, no adjacent roots running into garden beds or hardscape
- A decorative stump you plan to keep as a planter — those are a landscaping feature, not a problem
- Any stump where a test dig has confirmed shallow root spread and clean access
Give us a call when:
- The stump is within two metres of a structure, utility connection, or retaining wall
- The tree species was bigleaf maple, Garry oak, or Douglas fir — the root systems are substantial even on younger specimens
- You have hit resistance after 30cm and cannot identify the root pattern
- You want a clean, grass-ready surface within a week rather than waiting months
If you are genuinely unsure whether your stump qualifies for DIY, call and describe it. That conversation is free. Hiring us when you did not need to costs considerably more.