
Most ornamental trees are forgiving. Weeping cherry trees are not. They are precisely shaped, grafted onto foreign rootstock, and deeply committed to the weep. A weeping cherry that no longer weeps is just a cherry tree with regrets — and an arborist visit overdue.
The good news is that trimming one correctly is not complicated. The bad news is that trimming one incorrectly — wrong time, wrong cut, wrong read on the graft — is how you turn a $600 ornamental tree into a $600 lesson.
Quick answer: Trim in late fall dormancy or late February. First cut is always dead or diseased wood. Then suckers from below the graft union, watersprouts from the crown, ground-touching tips, crossing branches, and finally the canopy shape. Do not use wound sealant. Do not remove more than 25% of the canopy in one season. And before you do any of that — figure out whether your tree is grafted.
Nine out of ten weeping cherries in Surrey yards are grafted. That single fact changes everything about how you prune them.
Grafted vs. natural — this changes everything
Look for a visible swelling or knob on the trunk, 6 to 18 inches above the soil line. That is the graft union. Above it is the weeping variety — the part you bought. Below it is the rootstock, a different tree selected for vigour and disease resistance, with no interest whatsoever in weeping.
The rootstock, left to its own devices, will grow straight up. It did not sign up for the weeping cultivar plan. Every sucker it sends up from the base or from below the graft union is just trying to do what it was bred to do. If those suckers are not removed, they gradually displace the weeping crown above — not dramatically, but steadily, over three to five seasons.
On a grafted tree: Any growth originating from below the graft union must be removed at the root. Any vigorous upright shoots from inside the crown above the union — called watersprouts — should be removed entirely. Neither will develop a weeping habit.
On a natural weeping cherry(no visible graft union, smooth trunk from base to crown): do not remove the upright new growth at the crown. Those shoots will arc downward as they lengthen. They are next season's curtain. Remove them on a natural weeping cherry and you remove the weep.
If your tree has been gradually losing its weep over several seasons — trending toward an upright shape you did not ask for — nine times out of ten the rootstock has taken over. Ignoring rootstock suckers for three or four years does not just change the look. It can structurally displace the original variety. A tree in this state can sometimes be recovered in early-stage cases. A professional assessment will tell you which situation you are in.
When to trim in Surrey — and the window to avoid
Two windows work. One window causes serious damage. Surrey's wet climate makes the bad one easy to accidentally land in.
Window one — late fall dormancy. After the leaves have dropped but before the first hard frost. In the Fraser Valley that is typically mid-October to mid-November. The tree is dormant, disease pressure is low, and the vascular system has wound down enough that wounds form a protective barrier before pathogens can establish. This is the preferred window.
Window two — late February to early March.After the coldest weather, before bud swell. Acceptable if fall was missed. Disease risk is meaningfully higher in BC's wet late-winter conditions, so if you use this window, do it in a dry spell.
What to avoid:Pruning after first hard frost (frozen wood splits rather than cuts clean), pruning during or immediately after bloom (you are removing next year's buds), and major structural work in mid to late summer heat.
The one exception is a tree with a documented history of silver leaf disease or bacterial canker. The BC Tree Fruit Production Guide recommends summer pruning for disease-prone cherry trees specifically because bacterial populations are lowest during warm, dry conditions. If your tree has this history, July to August is worth considering for major work, even though it means losing some of the spring bloom window.
What you actually need
Three tools cover ninety percent of weeping cherry work. A fourth one covers the part where you realize you should have called sooner.
- Bypass pruners — for stems up to about 12mm (half an inch). Bypass blades cut cleanly past each other like scissors. Anvil pruners crush. Use bypass.
- Loppers — for branches 12mm to 40mm. Same bypass-vs-anvil principle applies.
- Pruning saw — for anything larger. A folding pruning saw is fine for most residential weeping cherries.
For a tree with any disease history, add a small bottle of isopropyl alcohol (70% or higher) and paper towels. You will wipe the blades between cuts.
Sharpen the pruners before you start. A dull blade compresses the stem, slows wound closure, and leaves a rough surface that holds moisture. This matters less on a healthy tree and matters a lot on one that has had trouble.
Five steps, in order
The order matters as much as the cuts. Work through this sequence and you will not miss anything important.
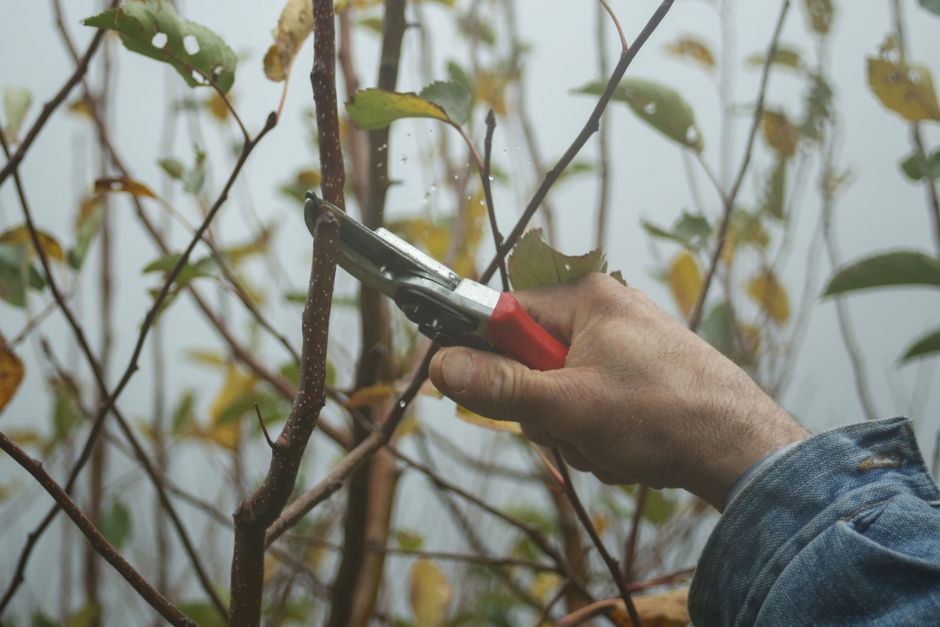
Step one: dead, diseased, and damaged first. These come out regardless of season or tree type. Dead branches are entry points for disease. Remove them cleanly back to healthy tissue, just outside the branch collar. Do not leave stubs.
Step two: trim branches touching the ground. Tips should clear the soil by at least 15cm (6 inches). Ground contact introduces soil-borne pathogens and retains moisture against the bark. Cut back to a lateral branch that clears the ground naturally.
Step three: remove crossing and rubbing branches. Where two branches press against each other, the bark at the contact point wears away. That open patch is a disease entry point. Remove the weaker branch at its base, cutting just outside the collar.
Step four: thin the congested interior. The interior of a weeping cherry should let light through. Dense interior branches shade the crown, reduce airflow, and put the tree at higher disease risk. You are not creating a hollow — just opening the canopy enough that you can see daylight through it.
Step five: refine the shape. Step back and assess the silhouette. A healthy weeping cherry has a naturally cascading umbrella form. Trim any branches that break that line. Work in stages — step back after every few cuts. You can always cut a bit more. You cannot reattach what you have already taken.
On the cut itself: slight angle, just outside the branch collar. Never flush to the trunk (you cut into the closure tissue). Never leaving a stub (stubs die back and create a disease entry point). Do not use wound sealant. The branch collar closes the cut naturally. Sealant traps moisture. Leave the tree alone.
Suckers and watersprouts — the step everyone skips
This is where most shape problems start.
On a grafted tree: Suckers growing from the base or from roots below the graft union are the rootstock re-asserting itself. They grow straight up. Clip them at the surface and the root remains intact — the sucker regrows thicker the following season. Remove them at the root, pulling them away from the trunk or cutting flush at the point they emerge from bark or soil.
Watersprouts — vigorous upright shoots from the crown interior, above the graft union — should be removed entirely, back to the parent branch. They pull energy from the weeping branches and will not develop a weeping habit.
On a natural weeping cherry: Upright new growth from the crown is not a watersprout in the problem sense. It is a new branch that will arc down as it matures. Leave it. The confusion between these two situations is responsible for most of the weeping cherries we see that have lost their shape. Someone read grafted-tree advice and applied it to a natural one, removing the very growth that would have become the curtain.
Rule of thumb: if you cannot identify the graft union and are not confident which type of tree you have, do not remove upright crown growth until you know. A misidentified tree is more expensive to recover than an unpruned one.
Disease and tool sterilization
Two diseases are worth knowing before you pick up a pruning saw.
Silver leaf disease (Chondrostereum purpureum) is a fungal pathogen that enters through fresh pruning cuts during cool, wet weather — which describes most of the Fraser Valley from October to April. Infected branches develop a distinctive silvery sheen on the leaves before dying. There is no fungicide treatment. Management means removing infected wood at least 10cm beyond the point where the discolouration fades in the cut surface. Dispose of all infected material by bagging or burning; do not compost it.
Bacterial canker (Pseudomonas syringae) infects via pruning cuts and leaf scars, presenting as sunken, weeping bark lesions and die-back. It is most active during cool, wet conditions — again, most of the BC interior-coast interface winter. Pruning in dry spells and keeping tools clean between cuts are the primary preventive measures.
For a tree that has shown signs of either disease: wipe blades between every cut with isopropyl alcohol at 70% or higher. Not bleach solution on carbon steel blades — it corrodes them quickly. Isopropyl, wiped and air-dried. Bag or burn all removed infected material. Do not compost it. Do not leave it in a pile beside the tree.
On a healthy tree with no disease history, between-cut sterilization is not strictly necessary. Sharpen and clean the blades before you start, and that covers most situations.
How much can you take off?
Rule of thumb: 25% of total canopy, maximum, in a single season. In the secondary spring window, take even less.
The reason is not caution for its own sake. Removing too much triggers a stress response — the tree floods the canopy with watersprouts in an attempt to restore foliage volume. You end up doing more work the following year and the tree looks worse for two seasons. The 25% rule prevents you from creating the problem you were trying to solve.
For a severely neglected tree — one that has not been touched in years, with dense deadwood, multiple seasons of watersprout growth, and branches dragging on the ground — do not try to fix it in one visit. Plan a two-year recovery. Year one: remove dead and diseased wood, all rootstock suckers and watersprouts, and the worst ground-clearance issues. Assess in summer. Year two: interior thinning and canopy shaping once the tree has had a season to respond. Trying to restore shape and health in one session almost always results in more than 25% removed, and the subsequent watersprout flush makes year two harder than it needed to be.
The same applies to old, overgrown specimens where major scaffold branches need removing. Take one large branch per season. The tree's recovery budget is finite. Work within it.
When not to call an arborist
Most healthy weeping cherries under about four metres are straightforward DIY work if you have the right tools and know what you are looking at. You do not need to call us for annual light shaping.
Do the work yourself if: the tree is accessible from the ground, you can confidently identify the graft union, the tree has no visible disease signs, and you are trimming within the 25% rule.
Call an arborist when:
- The tree shows signs of silver leaf or bacterial canker and you cannot tell how far the infection has spread
- The tree is over 4–5 metres and reaching the upper branches requires a ladder and a pruning saw simultaneously
- The tree has been losing its weep for multiple seasons and you suspect rootstock take-over — a misdiagnosis here does real damage
- You removed more than 25% last season and the tree responded with dense watersprouts you are not sure how to manage
Give us a call and we can tell you over the phone whether it is a DIY job or not. No charge to ask. We would rather you save the call-out fee than spend it on a job you could have done yourself.
For more on our general approach to ornamental tree pruning in Surrey, see our tree pruning services page. If you are dealing with a fruiting ornamental cherry rather than a weeping variety, the timing rules are different — our guide on pruning cherry trees in Surrey covers those.